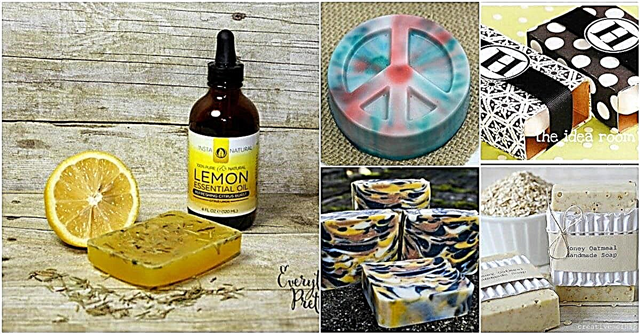
物事を壊すことは決して楽しいことではなく、時間の前に何かを捨てることをしばしば意味します。壊れたティーカップ、額縁、家具、またはゴミ箱にあると思われるその他の一般的な家庭用品がたくさんある場合があります。
それどころか、これらの壊れたアイテムを使用してさまざまなプロジェクトを実行し、屋内や屋外で見事な装飾を作成することができます。これらの壊れたアイテムや一般的な家庭ゴミを必要とする100の異なるプロジェクトのリストを集めました。
転用は、物事をゴミ捨て場から遠ざけ、あなたの家に少しの装飾ブーストを与えるための素晴らしい方法です。これらのプロジェクトは比較的簡単で、時間がかからず、何よりも優れています。ゴミを完全に再利用して有用なものにすることができます。
壊れた家財道具をつかみ、それを生き返らせることができるさまざまな方法を見てみましょう。あなたは彼らの言うことを知っています–一人の女の子のゴミは別の女の子の宝物です。
壊れた額縁をイヤリングホルダーに変える
額縁からガラスを割るとき(または子供やペットが割れるとき)は、台座を捨てないでください。代わりに、ゴージャスで非常に機能的なイヤリングディスプレイを作成するために使用します。イヤリングを掛けるには、ある種のワイヤーが必要です(写真のワイヤーは非常に効果的です)。ワイヤーをフレームにかけ、イヤリングを掛けます。これはすべての年齢の女の子にとって素晴らしい贈り物のアイデアであり、あなたは好きなだけ多くのレベルを作って、できるだけ多くのワイヤーを走らせることができます。ぶら下がる長いイヤリングがある場合は、レベルを長くしてください。
DIYの説明とプロジェクトクレジット– Kevinandamanda

壊れたエンターテイメントセンターからPlayキッチンを作成する
その古いエンターテイメントセンターをゴミ捨て場に運ぶ代わりに、数時間かけて、それをあなたの小さな女の子のための愛らしいプレイキッチンに変えてください。センターは、それを必要とするものは何でも補強できるので、完璧な状態である必要はありません。とにかく、それほど大きな重量を保持することは実際には期待されません。ほんの少しのペンキと想像力は、あなたがその古い目障りをどんな女の子にも何時間もの喜びを得る何かに変えるために必要な本当にすべてです。さらに、遊び料理のおもちゃをすべて保管するのに最適な場所です。
DIYの手順とプロジェクトクレジット– Diynetwork

古いバスケットでリサイクルセンターを作成する
継ぎ目でバラバラになっているように見えるかなり大きなバスケットがある場合は、そのバスケットを再利用して素晴らしいリサイクルセンターにすることができます。バスケットは本当に何かを保持できる必要はないので、底の穴は完全に細かいです。リサイクル用の籐バスケット内に廃棄物バスケットを配置し、セクションにラベルを付けるだけで、すべてがどこに行くのかがわかります。これは、引き裂かれたバスケットを有効に利用するのに役立つだけでなく、リサイクル品を保管するための本当に魅力的な場所を提供します。
DIYの指示とプロジェクトクレジット– Bhg

古いものから新しい夏のフリップフロップを作成する
ストラップが緩んで、一緒に保つことができないときにこれらのフリップフロップを捨てるのではなく、代わりにそれらからすべての新しい靴を作成することを検討してください。ほんの少しの生地で、夏にぴったりな愛らしい編みこみのフリップフロップを作ることができ、ゴミ箱の準備ができているように見えても古い靴を保つことができます。古いTシャツや、穴が開いて捨てる必要があるその他の服から編組ストラップを作ることもできるので、これはダブルスコアです。
DIYの説明とプロジェクトクレジット– Makeit-loveit

ベビーローションボトルを携帯電話の充電ステーションに変えましょう
ベビーローションボトルは、空になるとゴミ箱に溜まる傾向があります。結局のところ、これらの空のボトルで何ができるでしょうか?コードが外に出ないようにする、本当に便利な携帯電話充電ステーションを作成できます。ほんの少しの布地で、多少の切断と少しの時間で、携帯電話とコードをプラグインのすぐ隣に保持するこの本当に便利な携帯電話充電ステーションを作ることができるので、スペースを節約し、コードが横にならないようにします床(ペットを飼っている場合、偶然にも悪い場所です)。
DIYの説明とプロジェクトクレジット– Makeit-loveit

古いワイヤーバスケットから照明器具を作る
それらの古いワイヤーバスケットをダンプに送る代わりに、それらが完全に使い古された場合でも、それらを本当に魅力的な照明器具に変えます。バスケットのワイヤーが緩んでいたり、底に穴が開いていたりしても、それらを使用して、台所で見栄えのする人類学にヒントを得た照明器具を作成できます。バスケットを準備して、ペンダントライトに接続するだけです。キッチンの装飾に合わせて事前にペイントすることも、そのままにしておくこともできます。
DIYの指示とプロジェクトクレジット– Ashleyannphotography

壊れた鍋を庭のマーカーとして使用する
テラコッタポットが少し摩耗している場合は、捨てる必要はありません。あなたはそれらを使って豪華な庭のマーカーを作ることができます。これは、壊れたポットが1つしかない場合でも機能します。いくつかのピースを取り、花、ハーブ、野菜の名前をマジックマーカーで書いて、剥がれないようにしたり、創造性を発揮して名前をペイントしたりできます(それらに少しアートワークを作成することもできます) )。植え付けに適さない古いポットがいくつかある場合は、それらを使用して庭のすべてにラベルを付けます。
DIYの説明とプロジェクトクレジット– Hardlyhousewives

古いドレッサーを居心地の良いベンチに変える
この家具変身プロジェクトのすべてが大好きです!手順は簡単で、これらの古いドレッサーを安く手に入れることができれば、これは必須のプロジェクトです!
DIYの説明とプロジェクトクレジット– Grillo Designs

壊れたテラコッタをカボチャに変える
それらの古い壊れたテラコッタプランターは、美しいカボチャを作成するために使用できます。実際にはこれをいくつものセラミックで行うことができるので、皿や受け皿が壊れている場合はそれらも使用します。あなたは小さな断片を作り、それから泡のボールにモザイクのような外観を組み立てるだけです。これはクリスマスに最適なプロジェクトでもあり、休日の色を使用して装飾品を作成できます。それらは作るのが本当に簡単で、壊れたプランターと皿をゴミ箱に捨てるだけで勝ります。
DIYの説明とプロジェクトクレジット– Craftsncoffee

ひびの入ったプレートでアートを作成する
ひびの入った皿をすぐに捨てるのではなく、キッチンやダイニングルームの壁に飾れるアートに変えてみませんか?これは、実際に2つ以上のピースに分割されるプレートに最適なプロジェクトです。粉々になっている場合は、接着剤で接着したくない場合がありますが、大きい部品が数個しかない場合は、この方法で接着して壁を装飾することができます。これは、壊れたときでも取り除けない古い料理にとって本当に素晴らしいプロジェクトです。
DIYの説明とプロジェクトクレジット– Homelife

ひびの入ったプランターとプレートでバードバスを作る
ひびの入ったテラコッタプランターと壊れた板やひびの入った皿を使って、庭に美しい鳥の浴場を作りましょう。さまざまなサイズのプランターを使用できるので、破損しているプランターがいくつかある場合は、これを利用してプランターを再利用できます。それらを(必要に応じて)ペイントして、少しユニークにしてから組み立てるだけです。あなたはそれらのひびの入ったプレートとプランターをよりよく使用することを愛し、鳥はそれのためにもあなたを愛するでしょう。
DIYの指示とプロジェクトクレジット– Patriciaspots

壊れた傘から再利用可能なバッグを作る
傘の中の金属が壊れたら、通常はゴミ箱の時間です。しかし今では、その傘の生地を使用して、これらの本当にすっきりとした折りたたみ式の再利用可能なバッグを作成できます。少し縫製が関係していますが、全体として、これらの小さなバッグを作成するのは本当に簡単で、ロールに折りたためて、どこへ行くにも持ち運べます。これらは、物を家に運ぶために再利用可能なバッグが必要なときに、急な買い物旅行に最適です。それらは非常に小さいので、財布に入れておいて、そこにあることを知ることはできません。
DIYの指示とプロジェクトクレジット– Untrendylife

壊れたボトルからビーズを作る
壊れたボトルを普通に捨てるでしょう。ただし、そうする必要はありません。代わりにこの方法を使用して、そのボトルから美しいガラスビーズを作成できます。その後、ビーズを使用して、ジュエリーから風鈴まで、その他何でも好きなものを作ることができます。これは危険な工芸品になる可能性があるので、常に注意を払い、ガラスの破片から目を保護する必要があることに注意してください。あなたがそれのこつを得ることができれば、それらの古いボトルから何を作成できるかに制限はありません。
DIYの指示とプロジェクトクレジット–指示書

壊れたテーブルから2つの机を作る
傷が付いている、壊れている、またはその他の方法で破損しているキッチンテーブル、または本当に必要なくなったキッチンテーブルがある場合は、捨てないでください。代わりに、それを使用して、あなたの家で必ずヒットする2つの愛らしい壁のデスクを作成します。テーブルの真ん中は本当に必要ないので、これは真ん中に本当に損傷しているテーブルには素晴らしいプロジェクトです。端の部分を切り取り、ペイントまたは染色してから、壁に貼り付けます。
DIYの指示とプロジェクトクレジット– Migonishome

ボトルキャップからティーライトを作る
わかりました。ボトルキャップを捨てても実際には壊れませんが、とにかく再利用できます。それらを使用して、たくさんのキャンドルが必要なときに最適な愛らしいティーライトキャンドルを作成できます(結婚式やその他の大きなイベントを考えてください)。あなただけのボトルのキャップをきれいにし、芯を追加してから、いくつかのワックスを注ぐ必要があります。ワックスは実際には溶けたクレヨンから来ているので、これはダブルスコアです。あなたはそれらの瓶のキャップをゴミ捨て場から遠ざけることができます、そしてあなたはそれらの古い壊れたクレヨンであなたができることがあるのです。
DIYの説明とプロジェクトクレジット– Austinweddingblog

壊れたものから新しいクレヨンを作る
それらの壊れたクレヨンを投げる代わりに、それらから新しいレインボークレヨンを作ります。これはとてもシンプルなプロジェクトで、子供たちはこれらのレインボークレヨンを絶対に崇拝します。あなたは、いくつかのブリキ缶、空の処方薬ボトル、またはフィルムが入ってくるそれらの小さなプラスチック容器といくつかの壊れたクレヨンが必要です。基本的には、ブリキ缶でクレヨンを溶かし(最初に完全にきれいにすることを確認してください)、固まるまでボトルに注ぎます。クレヨンはぴったりのサイズで、壊れたクレヨンの数に応じて、好きなだけ色を付けることができます。
DIYの指示とプロジェクトクレジット– Momtastic

グラウンドカバーに壊れたプレートを使用する
実際の庭で壊れた皿を使いたくないのは確かですが、マルチの代わりにそれらを使用して、特定の領域に少し色を付けることができます。たとえば、根覆いや小石で木の周りを埋める代わりに、壊れた皿やテラコッタポットを使用します。あなたはそれを本当にエレガントに見せるためにそれらをすべて一色で行うことができます、またはそれをより楽しくてエキサイティングな見た目のために混ぜ合わせることができます。マルチやエンドウ豆の砂利よりもはるかに安価で、ガーデンエリアで非常にユニークな外観になります。
DIYの指示とプロジェクトクレジット– Apartmenttherapy

庭のエッジングとして壊れたプレートを使用する
壊れた皿や受け皿を、庭や樹木の周りの縁取りとして使うことができます。本当に手放せない古い陶磁器がある場合は、それらのプレートを使用して、ガーデンエリアの美しい境界線を作成します。割れたり欠けたりしたプレートは、半分に(もちろん慎重に)割ってから、半分を地面に突き刺します。同じ色を使用することも、少し混ぜることもできます。これは、これらのプレートの世話をするのに役立ち、お気に入りの屋外スペースに本当に安価で美しいエッジングを提供します。
DIYの説明とプロジェクトクレジット– Wondermom

古い本をアートブックにする
古い本(ページの半分が欠けている本)がある場合、それらを捨てる必要はありません。実際に古いハードカバーの本を使用して、お子様のすべての美術品を収納できる、とてもきちんとした機能的なアートブックを作成できます。スペースを取らず、持ち運びに便利なハンドルが付いているので、旅行に最適です。鉛筆やクレヨンのホルダーを作るには少し生地が必要です。それからハンドル、そしてもちろん画材も必要です。
DIYの手順とプロジェクトクレジット–コスモクリケット

壊れたクレヨンをクールな腕立て伏せに変える
腕立て伏せクレヨンは少し高価であり、複数の色を購入することは単純にあなたの予算にないかもしれません。自分のクレヨンで腕立て伏せをするよりも、壊れた古いクレヨンを取り除くのに良い方法はありますか?また、空のスティックのり容器を同時に廃止することもできます。スティックのりをきれいにし、溶けたクレヨンを注ぐだけです。その後、子供は必要に応じてクレヨンを上下に転がすことができます。これは本当に簡単で、面倒ではないので、子供たちがあなたを助けることができる素晴らしいプロジェクトです。
DIYの指示とプロジェクトクレジット– Infarrantlycreative

壊れたセラミックをデザイナーのプランターに変える
壊れた皿、受け皿、ティーカップなどを使用して、美しいデザイナープランターを作成できます。モザイク方式を使用して、壊れた破片を強力な接着剤またはmodポッジでテラコッタプランターに取り付けます。これは、デザインやパターンを作成したり、好きなように配置したりするだけで、創造性を発揮できる優れた方法です。プランターは個性的で美しいものになり、壊れた古い料理をダンプに送る必要がなくなります。
DIYの説明とプロジェクトクレジット– Allfreecrafts

壊れたグローブからライトを作る
あなたの地球は継ぎ目でバラバラになっていますか?あり、接着したくない、または接着できない場合は、それを使用して、これらの本当にユニークなライトを作成します。これらは子供部屋に最適ですが、必要に応じてキッチンに置くこともできます。彼らは同時に機能的で教育的です。ライトを取り付ける前に、内部を対照的な色にペイントして、ライトを目立たせるか、自然な色のままにすることができます。いずれにせよ、これらのライトは確実に会話を刺激します。
DIYの指示とプロジェクトクレジット–指示書

壊れたクレヨンと空の瓶をカラフルなキャンドルに変える
空の瓶や花瓶、いくつかの壊れたクレヨンは、通常はゴミ箱に捨てられますが、それらを組み合わせて、本当にカラフルなキャンドルを作ることができます。クレヨンを溶かして、色ごとに注ぎます。あなたは本当に素朴に見えるキャンドルのために古いメイソンジャーでこれらをすることができますか、あなたが捨てようとしているどんなガラスジャーを使うこともできます。あなたがバスケットでカップルを組み合わせたいと思っていて、彼らが作成するのにほとんど時間をかけないなら、これらは本当にすてきな贈り物になるでしょう。
DIYの説明とプロジェクトクレジット– Notimeforflashcards

壊れたジュエリーを新しい作品に変える
壊れたジュエリーのピースを取り、それらを組み合わせて見事なバングルとカフブレスレットを作成できますが、それほど長くはかかりません。壊れたジュエリーといくつかのジュエリー作成ツールを持っていれば、持っていきます(持っていない場合は、地元の工芸品店で非常に安価です)。あなたのスタイルにマッチするユニークで非常にクリエイティブな作品を作ったり、ギフトとして贈る特別なものを作成したりできます。壊れた古いコスチュームジュエリーを捨てる必要はありません。まったく新しいものを作るだけです。
DIYの説明とプロジェクトクレジット– Hellohydrangea

壊れた宝石から磁石を作る
古い壊れたイヤリング、ネックレス、ブレスレットやブローチを取り、それらから美しい磁石を作成します。宝石を磁石に接着し、冷蔵庫や掲示板を美しく保つために使用するだけです。大きなピースがある場合は、それらから磁石を作るか、小さなピースを組み合わせてパターンを作成し、磁石に接着することができます。熱い接着剤は宝石を磁石に保つためにうまく機能し、あなたの古い壊れたコスチュームジュエリーでそれをドレスアップすると、あなたの冷蔵庫はエレガントで見事に見えます。
DIYの説明とプロジェクトクレジット– Livelovediy

壊れたティーカップから鳥の餌箱を作る
ティーカップが欠けていたり壊れていたり、捨てるつもりの受け皿がある場合は、代わりにそれらと一緒に鳥の餌箱を作ります。これらは約1時間で作成でき、ティーカップまたはマグカップ、受け皿、接着剤が必要です。あなたの鳥の種を追加し、あなたはそのゴミを宝物に変えることに成功しました。あなたの鳥は彼らの新しいフィーダーを愛し、あなたはあなたの庭に美しいティーカップとソーサーを持っているというシンプルな優雅さを愛するでしょう。
DIYの手順とプロジェクトクレジット– Blogglebeans

壊れたジュエリーをキャビネットプルに変える
壊れたブレスレット、イヤリング、ネックレスを使用して、バスルームやキッチンの美しいキャビネットプルを作成できます。あなたはその壊れた宝石を取り、それをネジ付きのポストに接着します。地元の金物店でネジ付きのネジ付きポストのパッケージを約$ 1程度で受け取ることができます。エポキシ接着剤または同様に強いものを使用して、宝石を固定します。大きいサイズのコスチュームジュエリーが最も効果的です。小さいピースがある場合は、ベースに接着してから、ポストにベースに接着できます。
DIYの指示とプロジェクトクレジット– Threescoopsoflove

壊れたCDでクリスマスの飾りを作る
CDに傷が付いたり欠けたりすると、CDは正常に機能しなくなります。それらをゴミ箱に捨てる代わりに、それらを使用して、この来年のクリスマスにあなたのツリーを優雅にすることができるミニディスコボールの装飾を作成します。 CDを壊し(比較的無傷であると想定)、次にホットグルーガンを使用してこれらの部品をガラスの装飾品に接着します。発泡スチロールのボールでもこれを試すことができますが、ガラスの方がはるかに効果的です。銀色のCDを使用して、透明なガラスやさまざまな色の装飾を覆って、本当にカラフルな外観を作成できます。
DIYの説明とプロジェクトクレジット– Cremedelacraft

壊れた地球からポプリボウルを作る
何らかの方法で壊れた古い地球儀がある場合、半分を取り、ポプリを表示するための美しいボウルを作成できます。または、内部をペイントすると、風変わりなサービングボウルとして使用することもできます。いっぱいになったときに平らに保つために、地球の底に接着する丸い木製のプラークが必要ですが、地元の工芸品店でほんの少ししか拾うことができません。または、合板を使用している場合は、自分でカットします。次に、地球の半分をベースに接着し、素晴らしいボウルを用意します。地球の半分が良好な状態であれば、2つのボウルを作ることができます。
DIYの説明とプロジェクトクレジット–計画的な残り物

壊れたデスクからナイトスタンドを作成する
古いデスクが壊れていたり、すり減っていたり、損傷していたりする場合は、捨てる必要はありません。代わりに、それを使用して、一致するナイトスタンドを作成します。トップが完全に修理不可能な場合でも、ナイトスタンドを机から出して、やすりで塗って現在の寝室の装飾に合わせることができます。これは、両側に同じ数の引き出しがあるデスクで最適に機能します。必要に応じて、または両側に対応する引き出しがない場合は、デスクから1つのスタンドを作成することもできます。
DIYの説明とプロジェクトクレジット– Sugarbeecrafts

壊れた椅子からフレンチスタイルのベンチを作成する
それらの古い壊れたダイニングチェアを投げる代わりに、それらを取り、見事なフランス風のベンチを作成してください。これは、壊れた家具のための最もエレガントなプロジェクトの1つであり、最も簡単なプロジェクトの1つでもあります。同じスタイルの椅子が2つ必要で、ベンチシート用の木製の「ボックス」を作成する必要があります。次に、基本的に好きな色にペイントし(白を使用すると非常にエレガントに見えます)、軽いクッションを追加します。これは、ベッドの足、玄関、または家のどこにでも置ける優れたシートであり、実質的に(数百ドルで購入する場合と比較して)何もせずに作ることができます。
DIYの指示とプロジェクトクレジット– Anoregoncottage

壊れた椅子からかっこいいハンガーを作る
壊れた椅子の背もたれを使用して、非常にユニークでクールなハンガーを作成できます。背中を取り外し(または、椅子が完全にバラバラになった場合は持ち上げて)、ハンガーハードウェアを追加するだけです。クローゼットをいっぱいにするためにこれらを1トンも作りたくないと思うかもしれませんが、それらは壊れた椅子に何らかの効果をもたらし、ゴミを埋め立て地から遠ざけるのに役立ちます。さらに、彼らは素晴らしい贈り物を作るのに十分気まぐれです。
DIYの手順とプロジェクトクレジット– Likecool

壊れた椅子を芝生に変える
足を失った椅子はダイニングルームではまったく役に立ちませんが、芝生にぴったりの芝生にはぴったりです。あなたは古い椅子を取り、単にそれらをペイントし、いくつかのハードウェアを追加し、ポーチまたは庭の大きな木から吊るすことができます。これは、足が丈夫ではないために捨てることを検討しているダイニングチェアをいくつか持っている人にとっては素晴らしいアイデアです。それらをすべてブランコに変えて、それらに異なる明るい色を塗って、芝生をそれらで飾ります。
DIYの指示とプロジェクトクレジット– Thisdiylife

壊れた自転車を鍋とパンラックに変える
このプロジェクトでは自転車全体は必要ありません。車輪だけが必要です。自転車の車輪は、鍋やフライパンをぶら下げるのに最適なサイズです。丸いので、そこからターンテーブルタイプのラックを作成して、鍋やフライパンにいつでも簡単にアクセスできます。吊り金具をホイールに取り付ければ、天井に取り付けることができます。次に、鍋やフライパンにフックを追加します。これは壊れた自転車を上手く利用して、あなたに台所で少し組織を与えます。
DIYの指示とプロジェクトクレジット–指示書

壊れた自転車からベビーベッドをモバイルにする
これは思ったほど難しくありません。実際に自転車を吊るすわけではありませんが、壊れた自転車の車輪を使って素晴らしいモバイルを作ることができます。サークルは実際には形に最適で、ホイールのスポークは物をぶら下げるのに最適です。これは、惑星、太陽、月を順番にぶら下げる必要がある場合の太陽系プロジェクトにとっても素晴らしいアイデアです。丸い形は携帯電話を簡単に回転させることができ、あなたがあなたの小さな人の注目を集めたいと思うほとんどすべてのものを追加することができます。必要に応じて、オルゴールを置くこともできます。
DIYの指示とプロジェクトクレジット– Numinationavenue

壊れた洗濯機から火の穴を作る
このプロジェクトでは、実際には洗濯機全体は必要ありません。内側のドラムだけが必要です。あなたは裏庭のための素晴らしいファイヤーピットを構築し、同時にその洗濯機の一部がダンプになってしまうのを防ぐことができます。高熱塗料を使用する必要があり、多少の作業が必要になりますが、思ったほどではありません。ウォッシャードラムは完璧な形状を提供するため、ファイアーピットは完璧で、作成は非常に簡単です。涼しい夜に火のそばに座って、ゴミを少し節約する楽しみを想像してみてください。
DIYの指示とプロジェクトクレジット– Apartmenttherapy

壊れたドレッサーを棚に変える
ドレッサーが壊れている場合は、引き出しを使用して素晴らしい地図棚を作成できます。これは、別のものに変えようとしているドレッサーがあり、すべての引き出しが本当に必要ない場合に最適です。引き出しの下部にマップを追加し、それを壁にぴったりと掛けて、収集品をほとんど持たないシャドウボックスタイプの棚を作成できます。これはとても簡単なプロジェクトで、引き出しが完全な形である必要はありません。そのため、底が落ちていても、古いドレッサーをゴミ箱に捨てる代わりに、これらの棚を作成できます。
DIYの説明とプロジェクトクレジット– Olivebites

壊れたはしごを本棚に変える
壊れたはしごは確かにあなたが使い続けたいものではありません。もはや安全ではなくなった古い木製のはしごがある場合は、すぐに捨てないでください。代わりに、それを分解し、2つのセクションを一致する本棚として使用します。あなたはそれらの古いはしごのセクションで素朴な外観を作成し、壁に掛けるか、単に壁に立てかけることができます(もちろん、それらを頑丈にしていると仮定します)。各はしごの横木は、本、収集品、またはあなたがそこで必要とする他のほとんどすべてのものを保持します。
DIYの指示とプロジェクトクレジット–かろうじて測定

壊れた洗濯機のドラムをコーヒーテーブルに変える
インダストリアルな外観が好きな場合、または楽しくてユニークなコーヒーテーブルが必要な場合は、壊れた洗濯機からドラムを取り出して、テーブルに入れます。丸いガラス(カットしたい)で上部を覆い、内側を使用して物を保管したり、小さなシャドウボックス効果を作成したりできます。これの可能性は無限です。コーヒーテーブルがリビングルームを照らすのに役立つように、照明を好みに合わせて設置したり、木のトップを使用したりすることもできます。
DIYの指示とプロジェクトクレジット–指示書

壊れたスーツケースをテーブルに
壊れたスーツケース(重いビンテージのスーツケース)は、時間をかけて本当に便利なものに変えない限り、あまり効果がありません。スーツケースに脚を追加することで、リビングルームやベッドの足にぴったりの素晴らしいテーブルを作成できます。スーツケースの中に物を保管できるので、部屋を整理整頓しておくのに最適です。また、ヴィンテージの見た目もすっきりしていて、そのタイプの装飾が好きな人に最適です。
DIYの説明とプロジェクトクレジット– Designsponge

壊れたピアノをワークベンチに転用
機能しなくなった古いピアノをお持ちですか?それを埋め立て地に送ることを考えているなら、しないでください。代わりに、これを使用して、少しのストレージと編成を作成できます。古いアップライトピアノは、隠れたワークベンチにぴったりのサイズと形です。道具などを置くためのスペースを確保するために、ピアノの内部から一部のハードウェアを取り外す必要がありますが、これはガレージやワークショップに最適で、外出してベンチを購入するよりもはるかに安価です。さらに、ピアノのベンチは本や雑誌の保管に最適です。
DIYの指示とプロジェクトクレジット– Core77

壊れたヴィンテージスーツケースをペットのベッドに変える
あなたのゴミは実際にはペットの宝物かもしれません。古い壊れたヴィンテージスーツケースを持っている場合は、小さな犬や猫をそのスーツケースから愛らしいベッドにすることができます。基本的には、トップを外して(毛皮の赤ちゃんが閉まらないように)、ベッドの詰め物を追加するだけです。脚を追加することもできます。ベッドが必要なペットが複数いる場合は、上部と下部を使用して2つのベッドを作ります。これは本当に素敵でとても簡単なプロジェクトで、あなたのペットを喜ばせ、少しだけヴィンテージの装飾を加えます。
DIYの指示とプロジェクトクレジット– Chaoticallycreative

洗濯機のドラムをきれいなスツールに変える
壊れた洗濯機からドラムを取り出し、詰め物を追加すると、完璧な小さな便があります。ローリングキャスターの脚を追加して、少し特別なものにすることもできます。センターを詰め物で満たすか、センターの大きなドラム穴をカバーするような種類のトップを作成することを考えることができます。その上にスタッフィングシートを追加し、内部を保管用に使用できるように取り外し可能にします。これは子供に最適です。あなたは彼らのぬりえや他のおもちゃを中に置いておくことができ、彼らは遊んでいる間その上に座ることができます。
DIYの説明とプロジェクトクレジット– Espritcabane

壊れたバスタブをソファに
本当に?古い爪足浴槽のソファ?もちろんです。これは、いくつかの転用プロジェクトよりも少し複雑ですが、古いセラミックまたは鉄製の浴槽からこの美しくエレガントなソファを作成する価値はあります。カウチ用のスペースを作るために正面を切り取り、詰め物を追加して、必要に応じてペイントします。捨てようとしている古い浴槽がある場合は、代わりにこの見事なソファを作成してみてください。あなたは寝室、リビングルーム、または少し余分な座席が必要な場所でそれを使用することができます。
DIYの手順とプロジェクトクレジット– Greenmoxie

壊れた銀器を植物マーカーに変える
これらの古い曲がったり折れたりしたスプーンやフォークは、捨てる必要はありません。代わりに、それらを手書きの植物マーカーに変えることを考えてください。これは、その古い銀器をなくすだけでなく、本当に本格的で素朴な外観のガーデンエリアを提供する、本当に素晴らしいプロジェクトです。この簡単なプロセスでは、実際に名前を金属に刻印しているので、実際にはごみの準備ができた銀器から自分で作成できるカスタムマーカーが作成されたように見えます。
DIYの手順とプロジェクトクレジット– Mossymossy

壊れたドレッサーから美しいテレビスタンドを作る
引き出しが適切に機能しなくなったときに古いドレッサーを投げる代わりに、エレガントなTVスタンドに変えてください。上部の3つの引き出しを取り出し、他の引き出しを使用して、映画、CD、またはゲームシステムのアクセサリを保管できます。少しのサンディングとペイントと数時間で、大金を払ったように見えますが、実際には数ドルしかかからないエンターテイメントセンターを作成できます。寝室でもこれを行い、必要に応じて残りの引き出しをドレッサーの引き出しとして使用できます。
DIYの説明とプロジェクトクレジット–国内スーパーヒーロー

壊れたコンピューターモニターを水族館にする
これは少し労力を要しますが、特にあなたが本当にテクノロジーを楽しんでいる人であれば、それは完全に価値があります。ダンプに送る代わりに、そのモニターをくり抜いて素晴らしい水槽を作ることができます。子供たちはコンピューターモニターで絶対に魚を崇拝し、それは(モニターのサイズによっては)比較的小さいので、場所をほとんどとらない。これは古いタイプのモニター用であることに注意してください。フラットスクリーンモニターでは、これを実際に行うことはできません。
DIYの指示とプロジェクトクレジット–指示書

壊れた直立をエレガントなバーに変える
もはや曲を演奏しない古いアップライトピアノは、バラバラにして捨てる必要はありません。あなたはそれからすべてのあなたのカクテルパーティーのヒットになること間違いなしであるそれから美しいバーを作ることができます。実際の演奏部分を取り出して、ピアノを好きな色にペイントまたは染色する必要があります。キーの下側は素晴らしいワイングラスホルダーに変えることができ、背面のミラーはさらにエレガントにします。その古いピアノに敬意を表するなんて素晴らしい方法でしょう!
DIYの指示とプロジェクトクレジット– Househoneys

その壊れたギターから棚を作る
単にチューニングできなくなったギターや、何らかの理由で壊れたギターをお持ちの場合は、それを本当にすっきりとした棚に変えてください。ギターのフロントを取り外して(バックとネックに損傷を与えないように)、内部にシェルビングを追加する必要があります。これを音楽愛好家の部屋の壁に掛けたり、リビングルームに置いてみんなが鑑賞できるようにします。これは、CDやその他の音楽道具を保管するのに最適な場所です。楽譜の本棚として使用することもできます。
DIYの説明とプロジェクトクレジット– Diybudgetgirl

壊れたステムウェアを使用して植物に優雅さを与える
その壊れた脚付きグラスを捨てる代わりに、それを使って植物に光を与えます。脚付きグラスの茎が壊れると、鉢植えの植物にうまくフィットします。植物の土の中に入れて、実際のガラス部分にティーライトのキャンドルを追加するだけです。これはほんの数秒で、屋内と屋外の両方の植物に使用できる素晴らしいプロジェクトです。ガラスの上で自分を傷つけないように注意してください。これは、ベースにステムが付いているガラスで機能します。
DIYの指示とプロジェクトクレジット– Dumpaday

壊れた冷蔵庫を屋外のアイスチェストにする
冷蔵庫が壊れて交換しなければならなくなった場合、古い冷蔵庫をダンプに運ぶのが次のステップだと思うかもしれません。代わりに、壊れた冷蔵庫を素晴らしい屋外のアイスチェストに変えてください。冷蔵庫を動かしたり、冷蔵庫が壊れたりする前に、必ず冷蔵庫からすべてのものを取り除く必要があります。次に、それを木材で覆って(杉は本当にうまく機能します)、屋外のキッチンやデッキに最適なアイスチェストを作成します。冷蔵庫のラックやバスケットを使って、アイテムを胸の中に収納できます。
DIY Instructions and Project Credit – Reddit

Make A Kitchen Utensil Holder From A Broken Rake
When the handle breaks on your rake, don’t automatically trash it. You can use the rake part to create a really neat and rustic looking holder for kitchen utensils. You just have to clean the rake top up a bit to remove any rust and you may want to think about sanding and painting it if it’s really rusty. Then just hang it on the wall and stick your spoons and ladles on it. This is also a great project for holding tools in the garage or tool shed and you don’t really have to clean it up for that.
DIY Instructions and Project Credit – Community

Create A Basket From Broken Blinds
Broken mini blinds normally find their way to the trash can. After all, what could you possibly do with them other than throwing them away? You could actually use them to make a very neat little basket that takes very little time. You just use a weaving method to create the basket and remember to staple together as you go along so that the basket is sturdy. If you have pets that tend to tear up your mini blinds, use them to make baskets instead of tossing them. These baskets are perfect for holding office supplies or just about anything else you can think of.
DIY Instructions and Project Credit – Stephagruss

Make A Wineglass Holder From A Broken Rake
Keep the top of that old rake when it breaks and create a rustic wineglass holder. The sections of the rake top are perfect for holding stemmed glassware and it gives you a great country look. You can simply sand away any rust that may be on the rake and hang it in its natural form or you can paint it with spray paint if you need it to be a specific color to match your kitchen or dining room décor. This is a great project for those old rakes that have broken handles but the tops are still in good condition.
DIY Instructions and Project Credit – Tatteredstyle

Create A Beautiful Chair From Broken China
Instead of throwing out that china when it’s broken, use it to create a stunningly beautiful mosaic chair. This chair is relatively easy to make considering how complicated it looks and it’s a great way to preserve old china that you may simply not want to get rid of even when it’s broken. You just take the broken pieces and put them together on an old chair base in whatever pattern you want. You can use larger pieces or create a smaller mosaic pattern if you have smaller broken pieces.
DIY Instructions and Project Credit – Dishfunctionaldesigns

Build Picture Frames From Broken Mini Blinds
Old mini blinds that are no longer fit to hang aren’t necessarily trash. You can take those blinds and create picture frames in a number of sizes and colors. No matter what material your blinds are made of, you can make beautiful frames for your favorite pictures that are unique and will help you to save money on buying frames for those prints. You just have to measure the pictures that you want to frame so that you have an idea of how many pieces of the blind you need. Then just stack and staple the pieces together to create your frame.
DIY Instructions and Project Credit – Domesticimperfection

Use Chipped Teacups As Curtain Tiebacks
Instead of throwing out those decorative teacups or putting them in the back of a cabinet, use them to create elegant Victorian looking curtain tiebacks. You will need to cut a hole in the bottom for the curtain to come through and then screw a cup hanger into the window frame so that the handle of the cup can be hung. This is a beautiful look and is perfect for formal dining rooms, especially near the china cabinet where you have other dishes in the same pattern sitting.
DIYの指示とプロジェクトクレジット– Bhg

Make A Kindle Cozy From Torn Jeans
If you have old dishes that have seen better days, you can use them to create beautiful lighting for your kitchen or breakfast nook. You need cups and saucers in the same pattern or you could use different patterns and make it really unique and interesting. You will need to attach the lighting and this is better done on a wooden plank so that you can keep all of the cups and saucers straight and even. This is a neat project though and one that really won’t take you long.
DIY Instructions and Project Credit – Punkprojects

Make Lighting From Chipped Cups and Saucers
If you have old dishes that have seen better days, you can use them to create beautiful lighting for your kitchen or breakfast nook. This is a neat project though and one that really won’t take you long.
DIYの指示とプロジェクトクレジット– Apartmenttherapy

Turn Broken Shutters Into Garden Holders
A broken shutter and some mason jars give you the perfect materials to create a little mini garden for the home or yard. You just have to clean up the shutter, paint if you want and then add the mason jars which are held in place with hot glue. If you are planning to add heavier plants, use clamps. You can cover them up with twine or ribbon. This is great for a kitchen herb garden and keeps you from having to haul those old shutters off to the dump.
DIYの説明とプロジェクトクレジット– Sheknows

Use Broken Records To Make Bookends
Have some old vinyl records that are scratched beyond repair? You can use those records to make really cool bookends, which are perfect for teenager’s bedrooms or family rooms for the musically inclined. There is a really easy method that will allow you to bend the bottom of the records so that they sit flat on a surface. Then you just have to add your books. This is also a great way to organize those records or CDs that you have lying around. Just create the bookends from torn or scratched records and use them to keep good ones in place.
DIY Instructions and Project Credit – Homesessive

Create A Bulletin Board From Broken Mattress Springs
If you have smaller mattress springs (think baby bed mattresses or twin beds) you can use those springs to make really useful bulletin boards. This is actually a really neat project that you can customize however you want. Add a mirror, some shelves or just whatever else you want and then just sit the springs up against the wall near your desk. You can also hang it on the wall with some sturdy hardware which is great if you don’t really have floor space available.
DIYの説明とプロジェクトクレジット– Funkyjunkinteriors

Turn A Broken Door Into A Shelf
After you replace that broken door and before you throw out the old one, consider turning it into a glorious shelf. You can add fabric, batting and even lighting to create a wonderfully unique shelf that is as functional as it is lovely. The door can stand in the corner or up against a wall or you could add hardware to it for hanging. Older doors give you a great rustic look and you can add as many shelves as you need. Plus, the lights help to illuminate your favorite books or collectibles.
DIY Instructions and Project Credit – Bulbtoblossom

Make A Pot Rack From A Screen Door
If you have a broken screen door and you are considering replacing it, keep the old one. You can use that door to make a very roomy and very attractive pot rack for your pots and pans. Just repaint or re-stain the door and then use chains to hang it from the ceiling. You can add hooks to the screen part for hanging pots and pans and keep lids or other items on top so you get loads of organization and all from that broken screen door that you were planning to throw away.
DIYの指示とプロジェクトクレジット– Thekitchn

Turn A Broken Suitcase Into A Medicine Cabinet
Forget throwing that old vintage suitcase away. Even when it’s broken, that suitcase can be used to create a great looking and fully functional medicine cabinet. Just clean out the inside, add some small shelves and you have the makings of a beautiful vintage medicine cabinet that will bring to mind those old traveling medicine men. Add screws to the back to hang it on the wall and if you don’t really need to close the door, you can attach it to the wall open and add shelves on both sides.
DIY Instructions and Project Credit – House-capades

Make Shelves From Torn Books
If you have a few hardcover books that are missing pages or otherwise no longer being read, you can turn them into literal bookshelves. These are really neat and require very little work. In fact, you just have to hang a shelf bracket and then slide the book in. You can create an entire wall of these “book” shelves in just a few minutes and they are great for the bedroom of your favorite bookworm. They also work well in hallways to hold knick-knacks or just anywhere you need them.
DIYの手順とプロジェクトクレジット– Realsimple

Turn A Broken Door Into A Coatrack
Take that old broken door, add a few coat hooks and perhaps some mirrored pieces and you have a beautiful coatrack that is perfect for your entryway or mud room. You can do this with even a small piece of a broken door and then just stain or paint it whatever color you need to match your existing décor. If you have an entire door, you could add shelving or create cubbies to hold shoes and other items in the mud room. This is a great repurpose idea for old doors and for organization as well.
DIY Instructions and Project Credit – Prettyhandygirl

Create Napkins From Torn Denim
If your closet is filled with torn jeans that you are tempted to throw away, think about making a few denim napkins first. You can create beautiful napkins with minimal sewing and these are great for summer cookouts. You basically just fold and sew the denim and you can create pockets for holding silverware. This is an easy project and one that you can work on with different materials so whether you have old jeans in the closet or any other clothing that is ripped or stained, you can make napkins from any of it.
DIY Instructions and Project Credit – Yourpocketstylist

Make A New Aquarium From That Broken Old TV
If you have an old console television that no longer works – or a smaller TV for that matter – you can use the base to create a beautiful new aquarium. You will need to be very careful when removing the electronic pieces of the television and when installing the glass and other aquarium parts. This is a great weekend project and if you do have a console television, you will end up with a great aquarium that sits on the floor. The top of the TV is turned into a lift-off lid so you can feed your fish and tend to the aquarium parts as they need serviced.
DIYの指示とプロジェクトクレジット– Apartmenttherapy

Make Mirrors From Broken Rackets
Instead of trashing those tennis rackets when the insides come loose, turn them into sporty mirrors. You simply have to remove the netting from inside the racket and then add a mirror to fit that space. You may need to take the measurements (or the entire racket if it’s easier) to a glass cutter to get a mirror shape that will fit perfectly. Then just attach the mirrors to the rackets and hang them in your little tennis player’s bedroom or anywhere in the house.
DIYの説明とプロジェクトクレジット–カントリーリビング

Make A Garden Trellis From Broken Tennis Rackets
When you have several tennis rackets that are no longer fit for use (or you could use badminton rackets for this as well) you can turn them into a really nice looking trellis for the garden. This is great for homes with tennis players and it gives you something to do with those rackets instead of simply throwing them away. You just have to gather and group your rackets together, prepare a frame for them and then assemble it. You can paint them all the same color or go with different colors if you want something a bit bolder.
DIYの指示とプロジェクトクレジット– Apartmenttherapy

Turn Broken Drums Into Lights
If you have a drummer in the family and you happen to have a broken drum set, you can make gorgeous drum lights. These are great for the bedroom of your rock star or you could use them in a family room or rec room, whatever you prefer. They are relatively easy to make and can be easily hung from the ceiling. The drums work perfectly as lights and are a great touch if you are looking for something a bit out of the norm for your lighting. Plus, it keeps you from adding those drums to your local landfill.
DIY Instructions and Project Credit – Makelyhome

Create Stuffed Animals From Turn Gloves
If your gloves tend to only last one season before they rip or tear, you can make them last a bit longer by turning them into adorable stuffed animals. This is a great project to begin for the Christmas season as these little cuties make wonderful gifts for all the kids on your list. This is also a good project if your gloves have the fingertips missing because you will remove them anyway. You will have to do a bit of hand sewing but the project is really easy overall.
DIY Instructions and Project Credit – Boredpanda

Make Chainmail From Pop Tabs
Okay, so you would probably be throwing out those pop tabs with the cans, right? If you want, you can use those tabs to create a fabulous chainmail purse. It takes a little preparation and cutting to get the tabs ready but once you are done with that, you can simply put them together and create any number of chainmail items. You can do anything from a purse to a costume to picture frames or just about anything else that you can think of to create from your homemade chainmail.
DIYの指示とプロジェクトクレジット–指示書

Turn Toilet Paper Rolls Into Art
Okay, so they’re not technically broken but empty toilet paper rolls belong in the trash, right? Well, maybe not. You can actually use them to create stunning wall art so if you tend to like recycling, this is the perfect project for you. You can do this in any number of designs and the paint can be in any color that you need. No one but you will know that your elegant art actually began life as a cardboard toilet paper roll and you can help to minimize your trash by not having as many rolls to throw out every week.
DIY Instructions and Project Credit – Cutoutandkeep

Make Birdhouse Stands From Broken Ladders
When your old wooden ladders are no longer safe for you to stand on, you can turn them into beautiful stands for your birdhouses. This works with ladders of all sizes. If they are wooden, just paint them or leave them as they are if you want something a bit aged and rustic looking. You simply have to sit the birdhouses on top of them and you may want to attach them with a screw to keep them secure. You could have these sitting all over your garden area.
DIYの手順とプロジェクトクレジット– Hometalk

Turn A Broken Bed Into A Bench
An old headboard and footboard can be used to make a wonderful corner bench for the little ones. You just have to attach the two together, create the actual seat and then paint or stain the color that you want. Add a cushion and your little ones will adore sitting here to eat or play. You could use this in the dining room or put it outside on the deck if you need extra seating out there. It’s an easy project and a great way to use up those old parts from your broken beds.
DIYの指示とプロジェクトクレジット– Myrepurposedlife

Make A Beautiful Bench From That Broken Dresser
This is a great project for dressers that have several broken drawers. While you may want a couple of the drawers to work properly for use on the bottom, the rest of the dresser is basically removed to create the bench. You can then use the bench at the foot of your bed or even on a deck if you need additional outdoor seating. Paint or stain any color and create something that perfectly matches your existing furniture. This is an easy project that will take you less than a day to complete and keeps you from throwing out that broken dresser.
DIY Instructions and Project Credit – Prakticideas

Create Stunning Jewelry From Broken Clothespins
If you have had your clothespins for long, you may notice that the wood has begun to chip or pull completely apart from the spring. Go ahead and pick up new clothespins but save those old broken ones to create stunning jewelry. This is such an easy project and one that doesn’t require any special tools. Plus, it’s a great gift idea that is not only cheap but allows you to use up those springs instead of tossing them out. You can create pendants, earrings or even charm bracelets with them.
DIY Instructions and Project Credit – Michlinla

Create Pedestal Picture Frames From Broken Materials
Take those broken or mismatched candlesticks and those picture frames that no longer hang or sit upright and create elegant pedestal frames that are perfect for gift giving or keeping all to yourself. Just spray paint the frames and candlesticks the same colors and then glue them together once the paint has dried. These are so very easy to make and are perfect for older frames that no longer want to sit where they should. Plus, you can use those candlesticks that you don’t have any other use for.
DIY Instructions and Project Credit – Fancyfrugallife

Create Storage From Torn Books
While you may balk at the thought of tearing up your old books, if you have any that are already torn then this is a great project. You simply hollow out those hold books and use them to store your belongings. You leave the outside intact so when you add them to your bookshelves, they look like real books. You can use them to store items safely out of view and they are really easy to make. You can do one at a time or create a little nook with several book covers.
DIY Instructions and Project Credit – Sewingbarefoot

Use A Broken Door To Make A Crafting Table
A broken door that you can’t really use on your home any longer is perfect for creating a colorful crafting table that your little ones will love. You just use the door as the top and then place it on cube organizers which work to hold all of your little ones’ craft supplies. Actually, if you made it tall enough this would even work as an adult’s crafting table so it just depends on what you need. You can cover the door with fabric or just paint it the color that you want.
DIYの指示とプロジェクトクレジット– Marthastewart

Make A Lamp From A Broken Shovel
Have a broken shovel that you are planning to throw away? Before you do, take a look at this wonderful shovel lamp. It’s really easy to make and this is perfect for lighting up the pathway outside your garden area. Imagine the pattern that you could create if you had several of these. You could also use them for added lighting in the garage or in a workshop or just put them right there in the kitchen. You can spray paint your shovel whatever color you need so it’s easy to match the lamp to your existing décor.
DIY Instructions and Project Credit – Project-re

Create A Sporty Bag From A Torn Basketball
Basketballs don’t stay up forever. In fact, cheaper ones will begin losing air rather quickly and depending on the size of the hole in them, you may not be able to air them up again. When that time comes, you don’t have to toss them. You can make a fashionable and really cute bag from them that is perfect for any girl who is into sports. Note that you can do this with a volleyball or football as well so this is a great gift idea for your little cheerleader or a sports mom who is really supportive of her players.
DIY Instructions and Project Credit – Project-re

Turn A Torn Shower Curtain Into A Play Mat
When your shower curtain liner gets a hole or when the tops tear and you can’t keep it on the hooks any longer, you can turn it into a wonderful play mat that your children will adore. You can let the kids create roads and cityscapes for their toy cars or use dry erase markers and let them color their favorite pictures over and over again. Dry erase will wipe easily from the plastic liner so this is a great way to keep the kids busy and give them loads of creativity at the same time.
DIY Instructions and Project Credit – Filthwizardry

Keep Buttons From Torn Clothing for Jewelry
When you have a shirt or sweater that is torn or permanently stained, take a minute to remove the buttons before trashing the clothing. You can use those buttons to create beautiful button bracelets that are fun and would make the perfect inexpensive gift for someone special. You just cut a piece of elastic in the size you need, sew the ends together rather tightly and then sew on the buttons. You can create any number of designs and patterns and each bracelet can be completely unique.
DIY Instructions and Project Credit – Lillyella

Use Broken Dishes And Silverware To Make Wind Chimes
Have some broken china that you can’t bring yourself to part with? Or, perhaps you have some vintage silverware that can no longer be used for eating but you just hate to throw it out. Use those pieces to make beautiful wind chimes that you can hang from your porch. This lets you keep those dishes that you don’t really want to throw away and they make a beautiful sound when the wind blows. You could also use broken costume jewelry as accents if you have any on hand so this is a great project for using up a lot of your broken household items.
DIY Instructions and Project Credit – Songbirdblog

Turn A Broken Chandelier Into A Serving Tray
A broken chandelier (one that no longer works as opposed to one that is actually broken into pieces) makes a beautiful dessert tray. You will need to remove all of the hardware for the lighting from the base and each individual light. Then simply attach china plates to the places where the lights used to hand and use those plates for serving up your favorite desserts. This is a great project for upcoming weddings or is perfect for the Holidays when you want an elegant dessert tray. Broken costume jewelry like faux pearl strands are great for embellishing the tray.
DIY Instructions and Project Credit – Dreaming-n-color

Make Rag Rugs From Torn Clothing
Those old t-shirts that are no longer wearable and just about any other clothing that you may have that is ripped or torn can be used to make wonderful rag rugs. This is also a great project for torn sheets and even curtains in certain fabrics. You can use different clothing materials and colors to create a multi-colored rug or use sheets and old blankets in the same colors for something a bit more elegant. These rugs are perfect for the kitchen in front of the sink or you could use them in the bathroom as bath mats.
DIY Instructions and Project Credit – Littlehouseliving

Use Knobs From Broken Doors For Patio Flooring
Before you throw those old doorknobs away, even if the doors are completely useless, you can turn the knobs into beautiful flooring for your outdoor patio. Actually, you can also use those old burners from your stovetop that no longer work and other items around the house that are broken or otherwise trashcan bound. The different finishes will give your patio a great look and the pieces are very stable when you set them in soil and surround them with your favorite outdoor plants.
DIYの手順とプロジェクトクレジット–日没

Turn Doorknobs Into Wine Corks
When your doors are broken and in need of repair, keep the doorknobs and use them to create these beautiful and very unique wine corks. All you need are the decorative doorknobs and some cork, which you can buy at any craft or hardware store. You could also just use the cork that comes in your wine bottles if you wanted. This works best with old knobs that have screws in them or you could use old cabinet pulls if they are decorative enough. You simply have to push the screw into the cork by turning and get ready because this could take a bit of time. The end result however, is well worth the effort.
DIY Instructions and Project Credit – Brokegirlsguide

Empty Tin Cans Make Great Hairbrush Holders
While tins cans aren’t really broken, they are useless once you get the food out, right? Instead of adding them to your trash heap, use those cans to make wonderful holders for your hairbrushes. You just have to remove both ends of the cans, clean them very well with warm soapy water and then cover them with Washi tape, paint, wallpaper or just about anything else you want. Fabric works very well and hot glue does a good job of holding your cover in place. Then attach them with screws to the inside of your vanity door and you have a great place for storing and organizing brushes.
DIY Instructions and Project Credit – Thecreativeimperative

Turn Broken Picture Frames Into Decorative Molding
If you love the look of picture frame molding but aren’t really a fan of the cost, you can make your own with those old broken picture frames. If you have frames that have lost their backing or their glass has been broken, you just remove all of that, paint them the color that you want your molding to be and then hang them on the wall. You can use frames that are all the same size or create a pattern from frames of different sizes. This is a great look and one that seems expensive. Only you will know that you have salvaged trash to create it.
DIYの説明とプロジェクトクレジット–ボビラ

Make A Jewelry Holder From Broken Spindles
When stair spindles are broken, they may seem useless. You can however, repurpose them into gorgeous jewelry holders that are unique and very creative. You just have to paint them, add a base and then use them to keep your necklaces and bracelets from getting tangled. If you are looking for a unique gift idea and one that won’t cost a fortune, this is a good one. The best part is you make it from something that you were probably just going to throw away. You could also use an old drawer pull or broken costume jewelry to decorate it.
DIY Instructions and Project Credit – Sublime-living

Use Bent and Broken Silverware For Drawer Pulls
Instead of throwing out that old silverware when it bends or breaks, use it to make cabinet door handles instead. This is actually a really popular look and one that may cost a bit if you went out and bought all of those handles. Instead, you can make your own with silverware that you were planning to toss. If you have silverware that is tarnished beyond repair, simply clean it up a bit and paint it if you want to create rustic looking handles that look much more expensive than they are.
DIY Instructions and Project Credit – Whiteleycreek

Make Good Use Of A Broken Binder
When binders break, they are normally trash. After all, they’re really not that expensive and most people simply throw them out without considering what could be done with them. If you cut away the actual cover part, you can use the binder as a key holder. Just attach it to any wall with screws, which will fit nicely into the holes already in it, and then use it to hold keys or put it outside on the deck to hold grilling utensils, towels by the pool or anything else you need. You can paint it if you want or even mount a few of these onto a wooden base.
DIY Instructions and Project Credit – Upcycleus

Create A Stunning Table From A Broken Piano
There really isn’t a lot that you can do with an old piano when it stops working. You can however, create beautiful shadowbox type tables and depending on the size of your piano, you may be able to make two of these for the living room. You use the keys on the inside of the table to give it a really neat musical look and then cover with glass that you can have cut at your local hardware store or glass cutter. These are beautiful and help to somewhat preserve the look of the piano so you don’t really have to throw it all away. You can keep the best parts.
DIY Instructions and Project Credit – Trash2treasure

Turn Leaky Buckets Into Outdoor Serving Items
Those old leaky buckets are useless when it comes to holding liquid but they will serve as holders for your outdoor eating very nicely. You just take some time to give the bucket whatever look you want and then use it for holding silverware, napkins or other solid items when you eat out. Give it a great patriotic look and use it for your 4th of July table outside. It doesn’t take very long to create something great out of an otherwise useless bucket.
DIYの手順とプロジェクトクレジット– Hometalk

Make Soap Dispensers From Glass Bottles
If you tend to buy things in glass bottles (like certain bottled waters or wines for instance), you don’t have to necessarily chuck the bottles when they are empty. You can use them to make soap dispensers that are gorgeous and really functional. You will need to get some pumps which you can buy at a craft store or you could just preserve the pump from lotions if you want. Then just clean up and even decorate the bottles with broken jewelry, mosaics made from broken china or anything you want and fill with your favorite liquid soaps.
DIY Instructions and Project Credit – Theredchairblog

Make Coasters From Old Wine Corks
Instead of throwing out the corks when you are finished with the wine, use them to create great coasters. This is a great project for corks that no longer serve their purpose because they don’t need to be in perfect shape to make coasters. The coasters have a great beach-y look to them and they are easy to put together. You need a hot glue gun to attach them to each other and then just tie them off with ribbon or twine, whatever your preference. These are absolutely adorable and such a wonderful way to reuse those old corks.
DIY Instructions and Project Credit – Thefrugalnavywife

Make Monsters From Bread Clips
Once the bread is gone, you normally throw out the clips, right? Some people do use them for other things and if you are one of those people, this is a great Halloween project for you. You can turn those clips into adorable monsters that you hang on DIY garland to decorate for the holiday. Just paint monster faces on your bread clips and this works with clips of all sizes, even the ones that may be broken or chipped. Once you have your monster faces done, just clip them all onto a rope or string for hanging.
DIY Instructions and Project Credit – Craftyladylindsay

Create Berry Basket Snowflakes
Okay, so normally you would throw out those plastic berry baskets, especially if they’re broken. Before you do however, take a look at the beautiful snowflakes that you can create with them. This works well even with baskets that are broken or ripped. You really just need the bottom of the basket and it’s ok if the bottom is a bit worse for wear as well. Just create the snowflake shape and then glue and dip in glitter. These are great for hanging outdoors for the Holidays or you could even use them to decorate the tree.
DIYの手順とプロジェクトクレジット– Alphamom